 AMBER LOVE 02-OCT-2012 I started this CAPTAIN MARVEL costume in late August and finished in mid-September. It’s one of the few commissions I agreed to take this year. I love this design but it contained some elements I had never done before.
 The first concern I had was the raglan sleeves and the second was the piping detail that highlighted those sleeves. Instead of drafting pure raglan sleeves, I used a combination of a regular sleeve with a shoulder piece that connected from upper chest to the upper back.
I had bought cotton piping but only as a backup plan. I wanted the piping to match the wetlook red so I was forced to make my own piping. This is done by buying the inside cord, which Fabricland in Plainfield, New Jersey carries in regular and elastic so I chose the elastic; then using a zipper foot to get as close as possible to the cord while stitching the fabric together into a casing (if you don’t have a piping foot).
As with most superhero styles, I began with KWIK SEW 3052 figure skating costume pattern. The modifications are explained below. You may also want some 3/4″ double-stick hemming tape. It’s very handy to put things in place when straight pins won’t do. The zipper was not easy to find. My notes below explain how I resolved this.

Fabric from SpandexWorld.com:
1 yard of 1208 metallic gold
3 yards of 753 milliskin navy
2 yards of 764 wetlook red
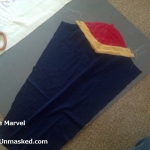 For whatever reason, when I drafted the pattern, I started with the sleeve. I had some leftover scraps in about the right colors as the final would be so I used scraps to create a sleeve mock up.
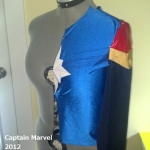 I pinned the sleeve to my dressform’s shoulder; pinned more scrap spandex to the front and back to draft where the color blocking was required (the gold stripes, the red shoulder girdle, the blue suit)
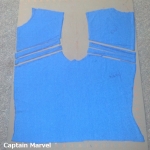 The torso’s main pattern pieces were cut up. The key is to remember to leave seam allowance on the sides that will attach where the original pattern had fit together.
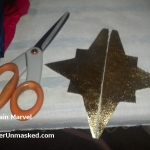 To make a chest logo, I drafted a design from paper. Metallic spandex can be flimsy to handle so I attach it to fusible webbing then cut out the logo design.
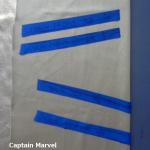 The gold stripes on the back are cut on the fold of the gold; the front ones are not. because this has a front zipper.
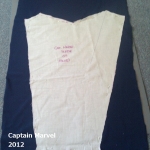 The main part of the sleeve is based on the commercial one but modified. See the mock up in step 1. I prefer to have sleeves done first so they are ready to insert when needed.
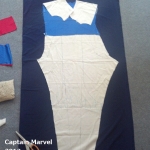 The bodysuit’s main part is also mostly the commercial pattern. Just go up as far as you need to and switch the top part out for the newly drafted one.
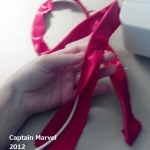 I believe it was 1 yard of piping made using an elastic cord and the red wetlook spandex.
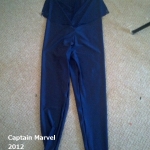 The blue portion was constructed so attaching colors can begin.
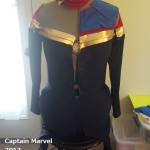 The gold was attached to the bodysuit. I constantly paused at each step to put everything back on the form and pin whatever was left.
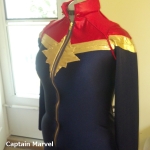
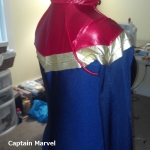
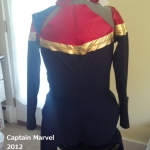 A look at the back at this point in the construction.
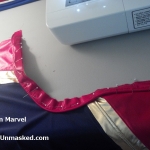 The red parts of the chest and upper back were attached to the gold. The piping was the next step to move on to the shoulder then sleeves.
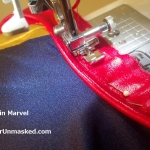 Close up look at sewing the piping.
 The top part of the shoulders was attached to the portions that were just piped.
 A look at the shoulder construction.
 TIP: I learned that the elastic cording of the piping kept slipping out of the casing as I sewed panels together. I had to painstakingly fish it back through then hold the ends in place with safety pins until the last possible minute when the collar was attached.
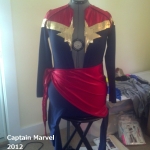 The logo was attached. The zipper would have to run through it. To help get the logo to stay in the right place, I used thin strips of double-stick hem tape. This contains a lot of corners and turning so all the pins can snag and stab. I used less because of the tap. I went around the edges with a zig-zag stitch then over them with a tighter zig-zag more like a satin stitch except on the edge that would have the zipper.
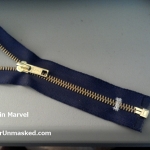 Here’s the problem with the zipper: I couldn’t find a closed navy zipper with brass colored teeth without having to special order one. I was trying to figure out the ordering process on one website and gave up. It said all zippers can be made separating or closed but in the checkout there was no option. Instead I bought a jacket zipper and made my own stopper by wrapping a lot of stitches around the teeth where I needed it to end.
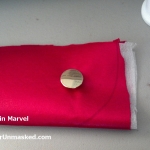 The fabric of the collar was attached to fusible webbing. I used disappearing ink to mark where the curve of the collar would be and then I attached the gold buttons. After cutting the curve and sewing the ends per the same instructions of the commercial pattern, mine didn’t look so curved when done. I’ve done this collar before a few time including for Rogue and it had previously worked fine.
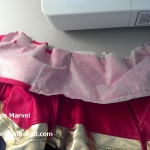 One edge of the collar got attached to the bodysuit. The other edge had an overlocking stitch run along it so that it would look more finished.
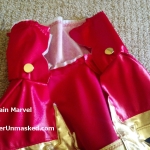 A look at the collar before finishing it. It’s turned inside out, right sides together; The ends get stitched; then flip it back open and hand stitch the edge with the overlocking stitches to the seam where the collar is attached to the suit.Â
A look at the collar before finishing it. It’s turned inside out, right sides together; The ends get stitched; then flip it back open and hand stitch the edge with the overlocking stitches to the seam where the collar is attached to the suit. 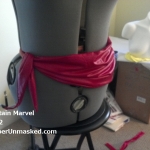 I hated my first sash so I used the remaining red and was able to get another one out of it. The tail ends aren’t as long as they should be but you should be able to get it more correct if you don’t screw up and waste the yardage.Â
I hated my first sash so I used the remaining red and was able to get another one out of it. The tail ends aren’t as long as they should be but you should be able to get it more correct if you don’t screw up and waste the yardage. 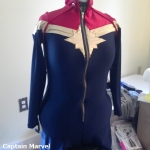
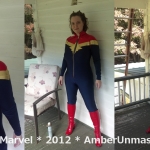
COMPLETED!
I’ve made 4 different Ms. Marvel themed costumes! (Black & Gold Carol Danvers 2011, Ms. Marvel Animated 2012, Captain Marvel Carol Danvers 2012, and Dark Avenger’s Ms. Marvel 2015).
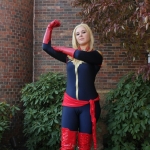
Here’s a few shots of Panda in the outfit after she made some nice adjustments. And now, it’s in the home of Lita.
9 Comments on Tutorial: Captain Marvel costume (Marvel)
Comments are closed.



The Capyain Marvel Looks GREAT on you.Well done.
The Captain Marvel Looks GREAT on you.Well done.
No worries whatsoever about the ongoing series of the marvel character, Carol Danvers, since marvel comics will continuously publish it because of comic book readers embracing the series with an enormous degree of passion.
KSD will go down in history for writing a series who’s sales WILL go through the roof!
KSD’s run WILL rank right up there with Chris Claremont’s run on X-Men, Frank Miller’s run on Daredevil, John Byrne’s run on Fantastic Four and Peter David’s run on Hulk.
Higher, Further, Faster, More!
Is there an easier to read/ follow format of these instructions?
Unfortunately no. I just upgraded the wordpress for the site. I can’t reformat 4 years of posts.
This is such a great tutorial. I have been a big Captain Marvel fan for a while now (can a guy rock this, cause I think she is a complete badass) and think I’m going to be bold and use this tutorial to be able to put together one for myself for Halloween next year (If I start now it should take me about that long to complete it lol). I was thinking about going with a shinier spandex material or leather material though. What do you think?
Plenty of cosplayers genderbend characters. No reason you couldn’t wear a Capt Marvel.
Hi! Are you selling this costume? I am not that great with the sewing machine. I found one on aliexpress, but it doesn’t look that good. Thx
This costume was a commission so it was sold when I made it. Sorry.