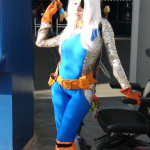
 Here are the work-in-progress and final pictures of Jill’s RAVAGER costume which she delightfully debuted at the 2010 Comic Con International in San Diego. Once again, I was not able to be there in person, but at least my energies were there in the form of another Jill project. (2009 was Rage Kitty).
The table below shows the progress of making the pattern pieces and stitching the suit together. I don’t have the exact pictures to match the steps but hopefully this will help give an idea to the construction. I took tons of measurements in person and still didn’t get it quite right because sequins do NOT stretch no matter what the descriptions say.
 To be honest, I knew very little about Ravager. I didn’t know if she was Death Stroke’s daughter or an apprentice taking over for him like they did with Terra and Slade in the Teen Titans cartoon. In fact, whenever I see Death Stroke, I usually call him Slade by mistake. All I did know was that I did not want to let Jill down and this suit scared the crap out of me. The only thing I made was the bodysuit; Jill took care of all the accessories: belt, gloves, swords, wig and eye patch. Her uncle, I believe painted the bare wooden swords and they came out super.

Like most of my costumes, I started with the Kwik Sew figure skater pattern, #3052. I modified the heck out of it to make it Jill's size and establish where the color blocking would be.

BELLBOTTOMS:
* Cut the pieces.
* Sew up 1 side.
* Add the black strip of fabric.
* Sew the hem.
* Sew up the remaining side.
The point of making bellbottoms was so that Jill could wear a reasonable shoe and not search for boots with gigantic oversized fold over flaps. This was easier and gave the same effect.

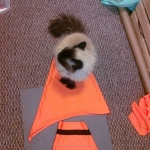
You can see I had help.

After cutting out the main section of the suit which was blue milliskin spandex from Spandex World, I think (Jill got all the fabric for me), sew the fronts together at the center seam.
Sew the backs together; baste only where the zipper will go.
Install the zipper.
Sew the shoulders.

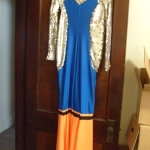
These next two pictures show the blue with the bellbottoms before the faux chain mail was attached.


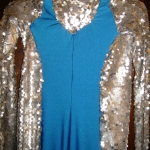
Sorry for the blurry picture. We couldn't find "allegedly" stretch silver sequined fabric. Jill found a couple types of sequins and one was really close. In the end we went with a black sequin which Jill painstakingly spray painted!

The faux chain mail was attached. Due to the non-stretch quality of the fabric, it presented a problem in the chest and shoulders.

FINI!
1 Comment on Tutorial: Ravager
Comments are closed.


Very well done!